About the plugin
Estatebud Connect is an official WordPress plugin developed and maintained by the Estatebud team. It brings advanced real estate features to any WordPress powered website. The plugin is compatible with all themes and page builders.
Prerequisites
Before installing the plugin, make sure WordPress is installed and configured on your host. Most hosting providers offer one-click WordPress installation, or you can install it manually by downloading WordPress from https://wordpress.org/download.
Minimum requirements
-
WordPress 6.0 or later.
-
PHP 8.1 or later.
This plugin may not be compatible with our legacy WordPress plugin. If you have another Estatebud plugin installed, we recommend uninstalling it to avoid compatibility issues.
We discourage using the plugin with themes enriched with real estate functionality, as these themes typically add a significant overhead to your website by performing a large amount of unnecessary database operations, which may negatively impact performance.
Installing the plugin
Download Estatebud Connect from our private repository:
https://repo.estatebud.com/estatebud-connect
Once the download is complete, follow these steps to install the plugin:
-
Sign in to your WordPress admin dashboard.
-
Go to Plugins in the main menu.
-
Click Add New.
-
Click Upload Plugin.
-
Select the plugin file you downloaded.
-
Click Install Now, then Activate.
After activation, a new Estatebud menu item will appear in the WordPress admin menu. You can now begin to configure the plugin.
Updating the plugin
Plugin updates are automatically installed by default, according to the release tier you have subscribed to (see details below). If you prefer to manually install plugin updates instead, automatic updates can be disabled in the plugin settings.
The following release tiers are available:
-
Release
-
Pre-release
-
Beta
-
Alpha
For production websites, we recommend that you have this set to Release.
If you want to explore new features and the most recent changes, you may also change to one of the other release tiers. Beta and Alpha tiers are discouraged from usage in production, as they may include new features that are currently in development, incomplete, or not tested.
Plugin updates will follow the same hierarchy as listed in the above release tiers. That means if you set the release tier to Pre-release, you will receive updates from both Pre-release and Release channels, whichever is newest. Likewise, if you select Alpha, you will receive updates from Alpha, Beta, Pre-release and Release channels, again, whichever is newest.
Configure the plugin
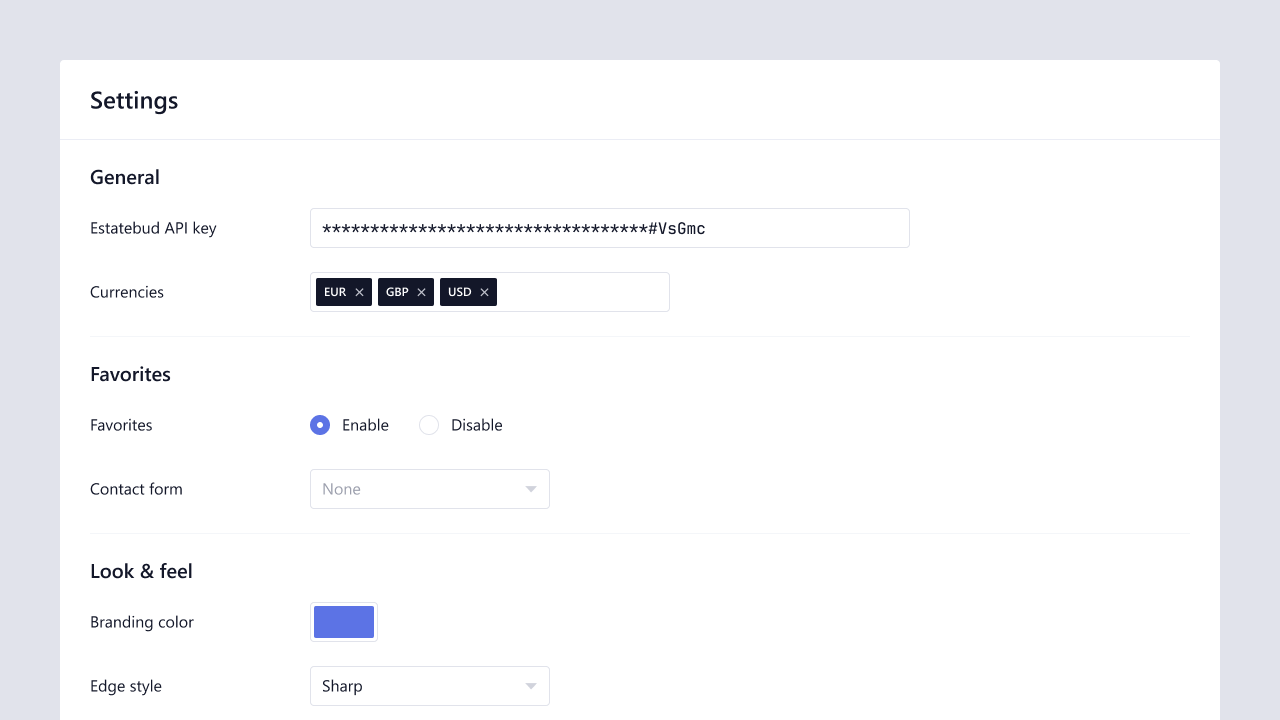 After installing the plugin, click Estatebud in the WordPress admin menu and open the Settings tab.
-
Generate a new API key in your Estatebud workspace.
-
Go to Estatebud → Settings in WordPress.
-
Copy and paste the API key into the Estatebud API key field.
-
Adjust any additional settings as needed.
-
Save your changes.
Once connected, the plugin will display basic information about your workspace, confirming that the connection has been established.
With the plugin connected, you’re ready to begin customizing it further and start adding powerful real estate functionality to your WordPress website. Continue to add a search experience, or create a new form.
Create a search experience
 A search experience allows you to display real-time property or project data powered by the Estatebud API.
You can refine results using predefined filters, making it easy to:
-
Create targeted landing pages.
-
Highlight specific parts of your portfolio.
-
Display featured properties or projects on your homepage.
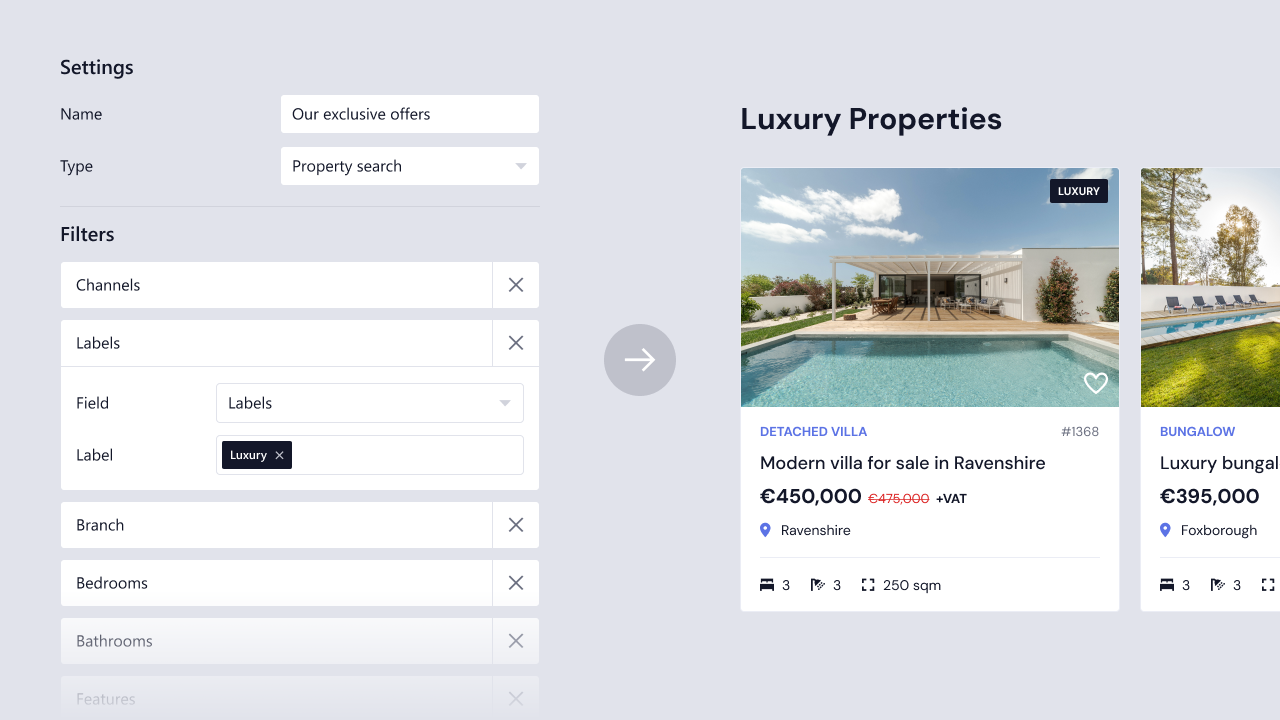
Create a new search experience
-
Go to Estatebud → Search experience in WordPress.
-
Click new and add a descriptive name to easily identify this search experience.
-
Select the type of search experience you want to configure:
-
Property search
Primarily used by real estate agents, in order to show individual property units in the search results.
-
Project search
Requires the Developments add-on to be activated in your workspace. Primarily used by property developers, and will present a project rather than individual units. Search results will show values based on the units assigned to the project, with support to show a table of all units and their current availability.
-
-
Add necessary filters to be applied to this search, which are not visible in the search results. If you want visible filters that can be changed by users, you should create a form. In case the same field exists in both your search experience and form, the field will be prefilled with the value selected in your search experience, allowing users to change it.
-
Save the search experience.
After creating your search experience, use the shortcode generator to add the search experience to a page. Your search experience can also be combined with a form, if you want users to be able to adjust the filters on their own.
Create a form
 Forms are used to:
-
Capture contact details.
-
Filter search results within a search experience.
To create a form:
-
Go to Estatebud → Forms in WordPress.
-
Click new and add a descriptive name to easily identify this form.
-
Select the type of form you want to configure:
-
Contact
Allows you to create a contact form with data synchronized to your workspace (on supported plans). Contact forms can also send email confirmations and perform data validation prior to being submitted.
-
Property search
Primarily used by real estate agents, in order to show individual property units in the search results.
-
Project search
Requires the Developments add-on to be activated in your workspace. Primarily used by property developers.
-
-
Configure your form and add fields that you want users to be able to interact with. You can use a list of predefined fields from your workspace, or create your own custom fields for full customization options.
-
Save the form.
Use the shortcode generator to add the form to a page. Forms can be combined with a search experience to display real-time results based on the selected filters.
Protecting forms with anti-spam challenges
Forms created in the plugin are automatically protected from spam if you have enabled a captcha provider in the plugin settings. All forms protected by captcha will have a small disclaimer visible at the bottom, to notify the user that the form is protected.
Confirm or update your captcha settings:
-
Go to Estatebud → Settings in WordPress.
-
Make sure you have selected a captcha provider, and added the mandatory key/secret.
-
Save your settings.
Generating shortcodes
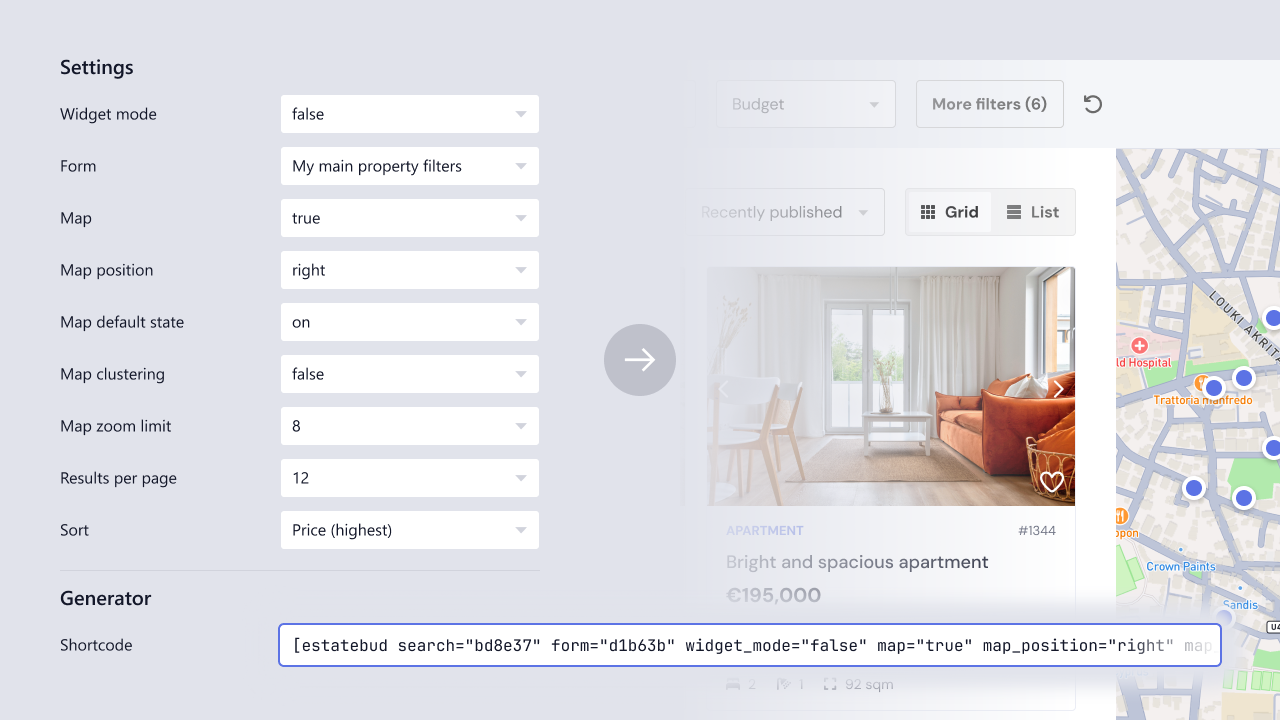 To display a form or search experience on your site, you need to generate a shortcode.
The shortcode generator allows you to enable or disable advanced features such as map display, widget mode, and more.
Generate a shortcode
-
Go to Estatebud → Search Experiences or Forms in WordPress.
-
Click on the shortcode generator button.
-
Adjust the settings to your preferences.
-
Copy and paste the generated shortcode on your page.
Mortgage calculator
 Display a convenient mortgage calculator that is prefilled with the relevant details of the listing that is currently being viewed. Displays a monthly repayment amount, calculated according to the given input values that can be adjusted by the user.
The mortgage calculator is only visible on listings that are listed for sale.
Enable or disable the mortgage calculator
-
Go to Estatebud → Property listing or Project listing in WordPress.
-
Change mortgage calculator to enabled/disabled.
-
Save your settings.
Favorites
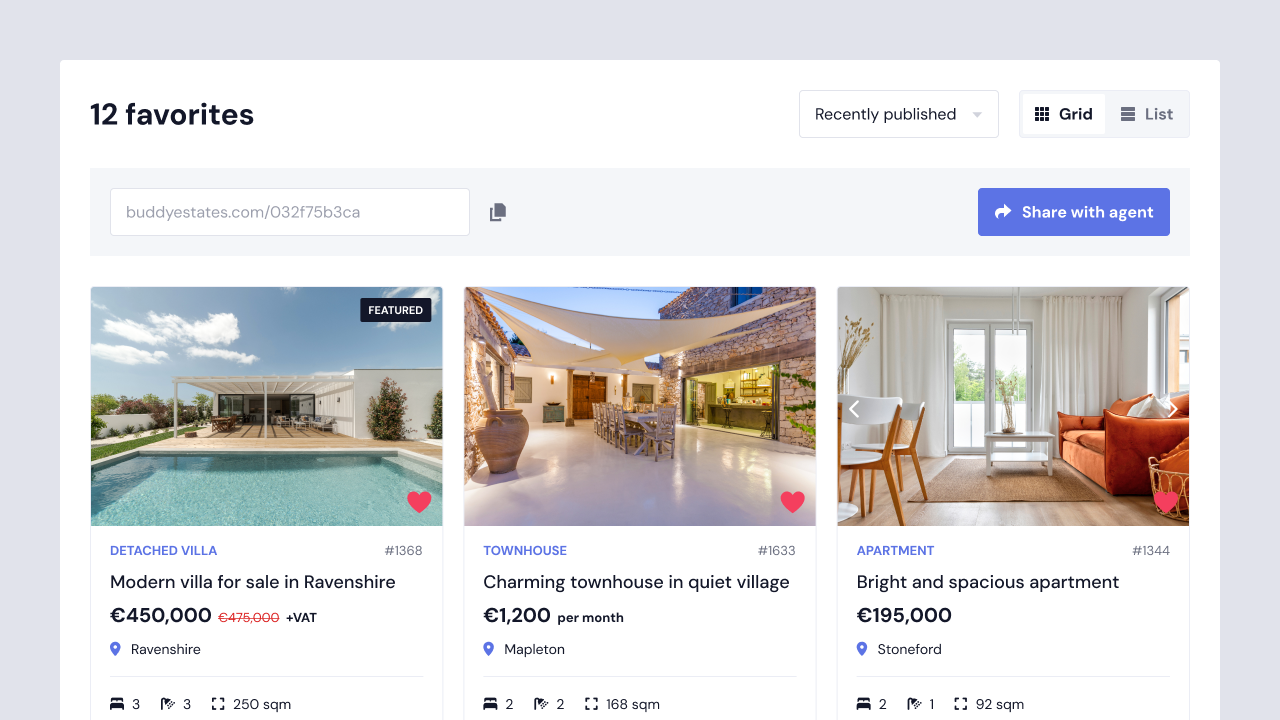 Let website users bookmark properties and projects by adding them to their list of favorites. Favorites can be viewed from a dedicated page on your website, giving users a quick and convenient way to access their favorites.
Sharing favorites
Estatebud Connect also supports sharing of favorites. When a user is viewing their favorites, they can copy their unique link and share it with others. People with access to the shared link can see their favorites, but will not be able to modify the list of favorites. The shared favorites list is also automatically updated, if the owner makes any changes to their favorites.
Enable favorites
-
Go to Estatebud → Settings in WordPress.
-
Make sure favorites is set to enabled.
-
Assign a contact form if you want users to be able to submit their list of favorites.
-
Save your settings.
Displaying favorites on the website
Use the shortcode generator to generate a shortcode. In the list of options in the shortcode generator, make sure to set Favorites to either Property or Project. Copy and paste the generated shortcode to your favorites page.
Currency selector
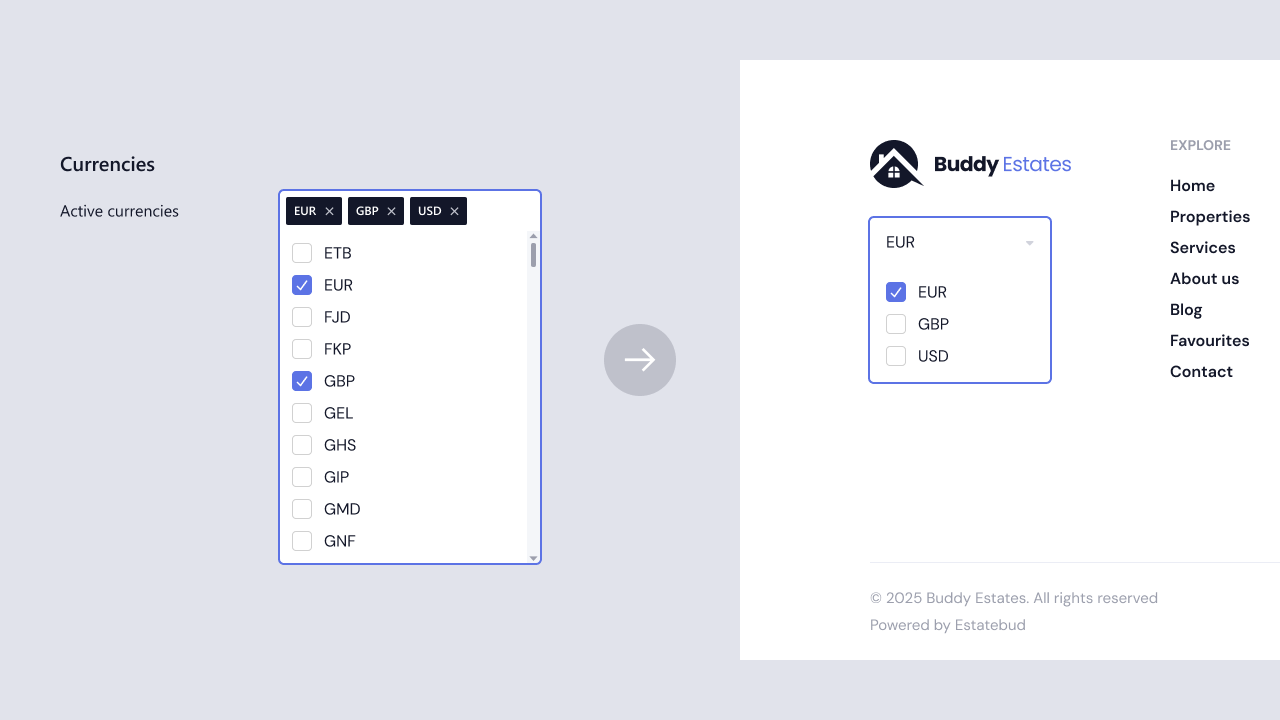 Adding a currency selector allows users to change the display currency used throughout the website. Currency data is provided in near real-time from the Estatebud API, and features an extensive list of currencies from all around the world.
Select additional currencies
-
Go to Estatebud → Settings in WordPress.
-
Add the currencies you want users to be able to use on the website.
-
Save your settings.
Displaying the currency selector element
In order for users to be able to see the currency selector, you must add the currency selector shortcode to your page. Since the currency selector will change the currency throughout the website, we recommend to place it on all your pages. The footer is usually the best placement.
Add the following shortcode: [estatebud_currency]
Multilingual websites
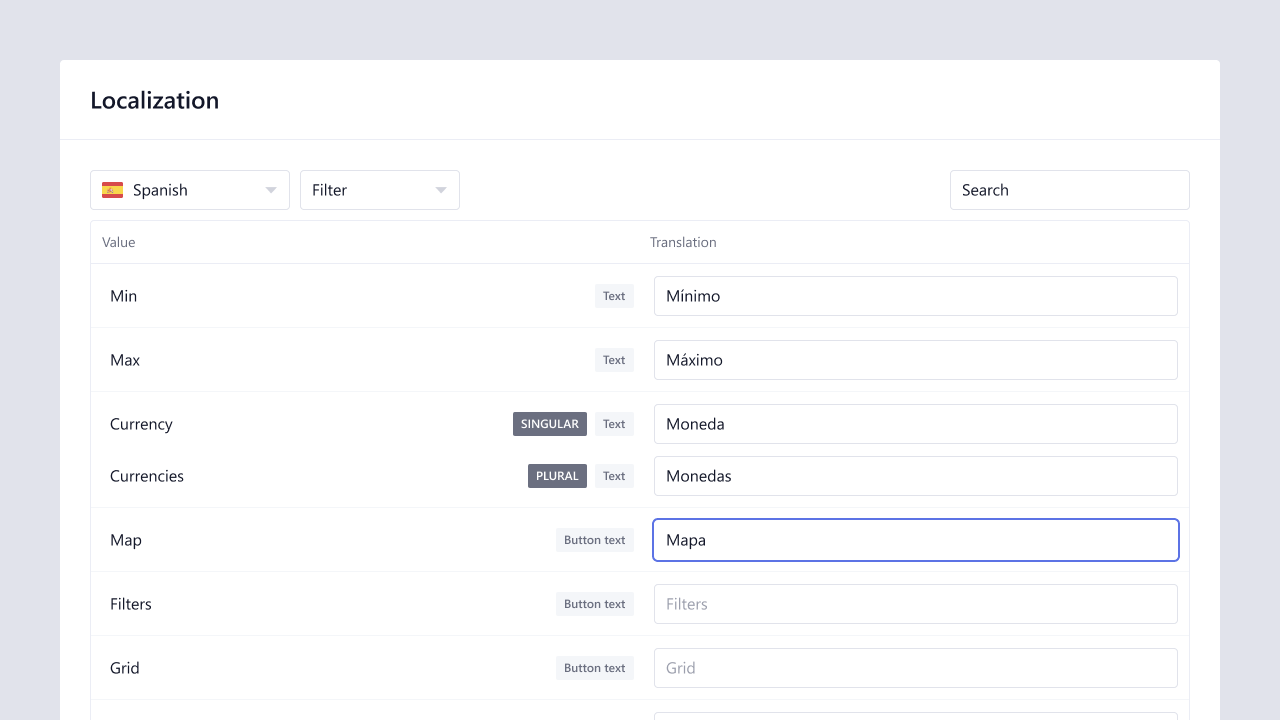 The plugin supports multilingual websites through the Localization tab in the plugin settings.
Languages used on your WordPress site are automatically detected when you use a supported translation plugin, making it easy to manage translations for each language.
Supported translation plugins
-
Polylang
-
TranslatePress
-
Weglot
-
WPML
The list above is presented in alphabetical order and does not imply any preference or recommendation.
If your translation plugin is not listed above, consider changing to one of these plugins or reach out to our team for further assistance.
Interactive maps
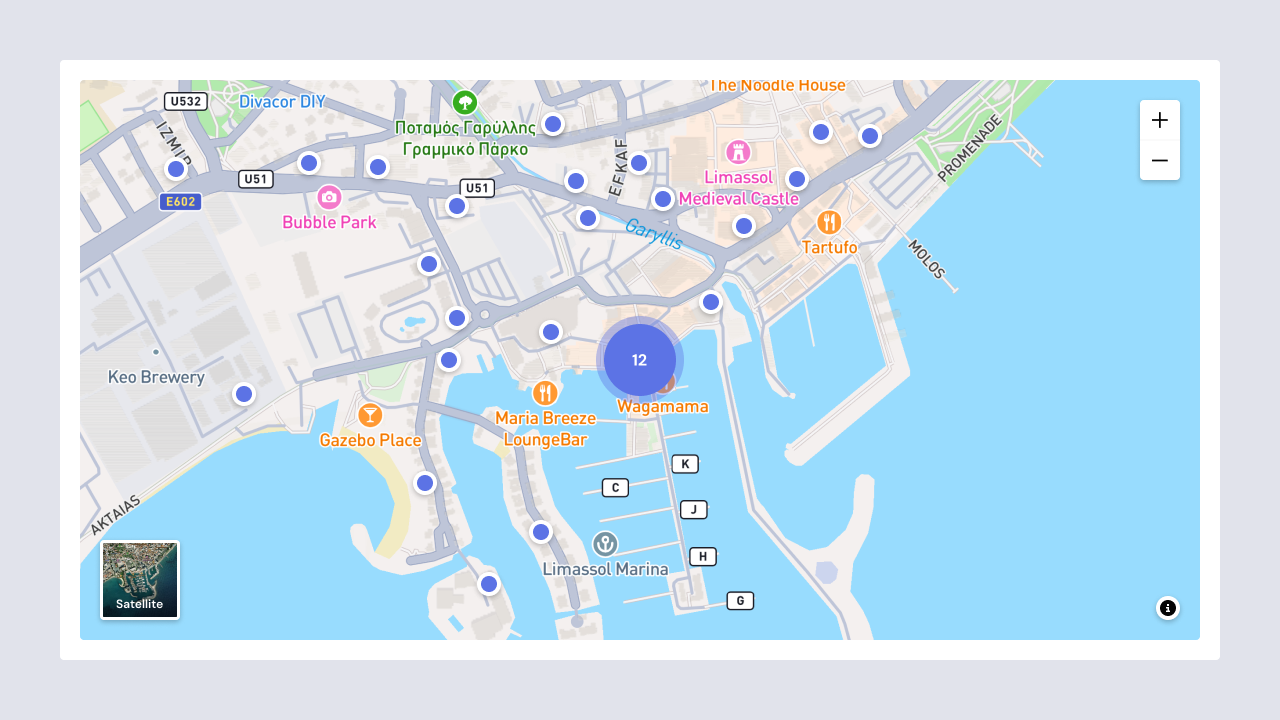 Estatebud Connect integrates with multiple map providers. You can select and configure your preferred provider in the plugin settings.
Data sources
-
Google Maps (usage costs may apply according to Google Cloud pricing)
-
Mapbox (usage costs may apply according to Mapbox pricing)
-
OpenFreeMap (free)
-
OpenStreetMap (free)
The list above is presented in alphabetical order and does not imply any preference or recommendation.
To use Google Maps or Mapbox, you’ll need to obtain an API key from the respective provider by creating an account on Google Cloud or Mapbox. If you’re using Google Maps, please note that the Map Tiles API must also be enabled.
You may find complete instructions to configure Google Maps and Mapbox below:
Search engine optimization
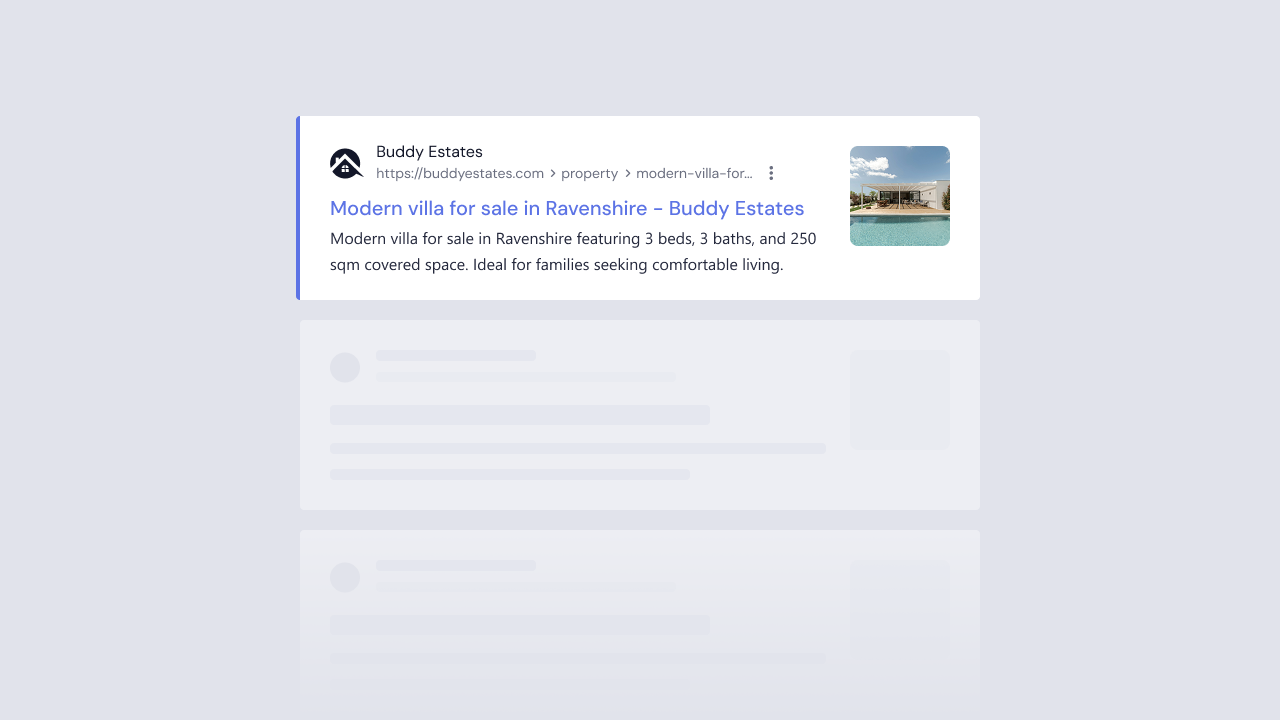 Estatebud Connect automatically generates search engine friendly content - with no additional configuration necessary. Important meta data is also added to your page, to help search engines and social media networks understand your content and better display your website in the search results.
If a supported SEO plugin is installed on your website (see list below), internal SEO optimizations will automatically be disabled and meta data will be shared with your SEO plugin. This ensures a consistent SEO-approach throughout your website, for the best possible results.
Supported SEO plugins
-
All in One SEO
-
Rank Math SEO
-
Yoast SEO
The list above is presented in alphabetical order and does not imply any preference or recommendation.
If you are using a different SEO plugin which is not listed above, SEO optimizations will be provided by Estatebud Connect. To avoid possible conflicts, we recommend disabling your SEO plugin on pages generated by Estatebud Connect.
Tracking conversions
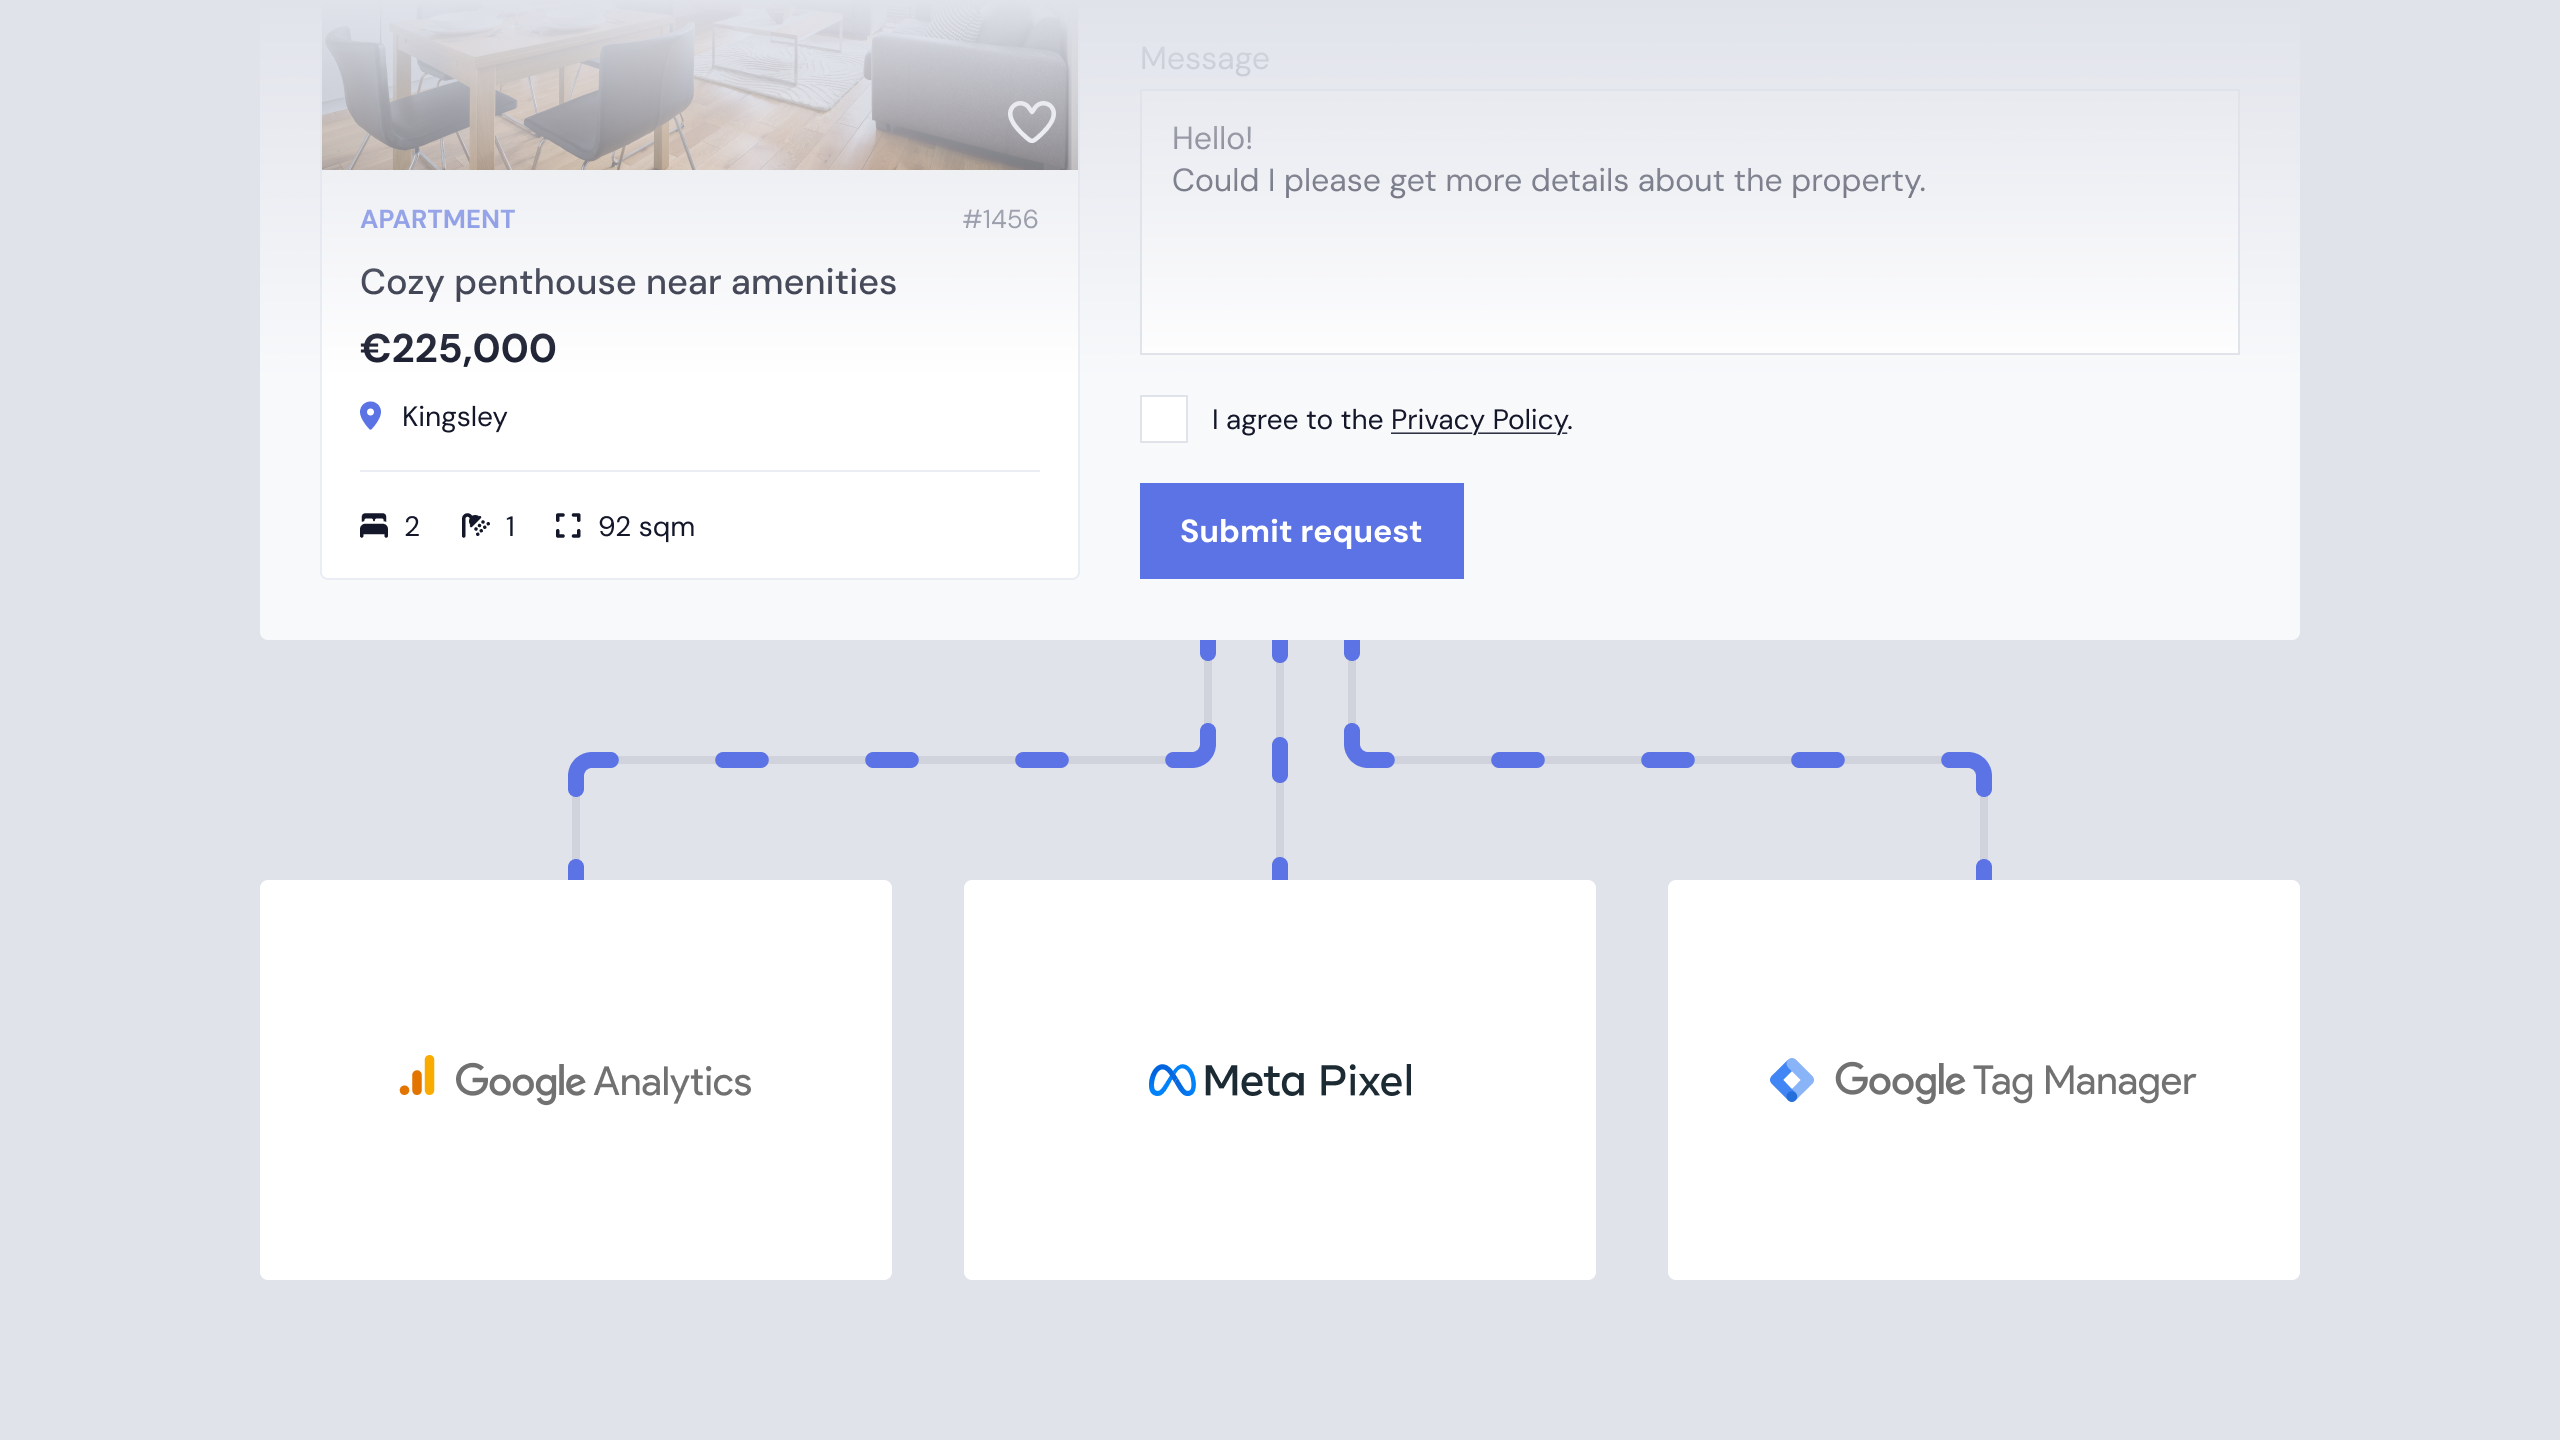 Estatebud Connect will automatically capture and dispatch tracking events. This occurs when a form is successfully submitted, and automatically includes valuable metadata, such as the currency and listing price.
Prerequisites
Before you start, make sure you have the global analytics tag required by each vendor installed on your website. If the global tag is not installed, conversion tracking will be disabled.
Supported tracking providers
-
Google Analytics/Ads
Obtain your website tag via Google Analytics or Google Ads. -
Google Tag Manager
Obtain your website tag via Google Tag Manager. Using Google Tag Manager, you must configure a trigger.-
Go to Triggers → New → Trigger Configuration.
-
Choose Custom Event.
-
Enter the Event Name (defaults to generate_lead).
-
-
Meta Pixel
Obtain your website tag via Facebook.
Estatebud Connect will submit contact forms using event generate_lead by default, unless you have specified another value in your form conversion settings (see additional details below).
Forms submitted on listing pages will transfer additional data: currency (example eur) and value (example: 539000), representing the value of the listing. You may map these variables as needed according to your reporting standards.
Using custom tracking events
Specifying a custom tracking event will replace the default event, and should only be used if necessary for conversion reporting purposes.
-
Go to Estatebud → Forms in WordPress.
-
Edit the form you wish to add a custom tracking event to.
-
Find the Conversions tab and enter your custom event id.
-
Save your changes.